
Water damaged hardwood floor repair at Bellflower Wood Flooring starts with the source, not the stain. We restore wet, cupped and buckled wood floors in Bellflower, CA, and serve surrounding cities including Paramount, Lakewood, Norwalk, Artesia and Downey. Whether the water came from a supply line, a dishwasher, a water heater or a slab leak under the house, we find where it came from, measure how far it spread and decide what can be saved.
With more than 20 years spent repairing wood floors, we know that a floor ruined by water is often a floor that was repaired too fast. Boards sanded while wet crown as they dry, and new wood laid over a damp subfloor cups within weeks. We record moisture readings before, during and after drying, and we photograph each stage so you and your adjuster have a clear record.
The sections below explain how water damages hardwood, how we assess and dry it, when boards need replacing, and how the repair works alongside plumbing and insurance.
How Water Damages a Wood Floor
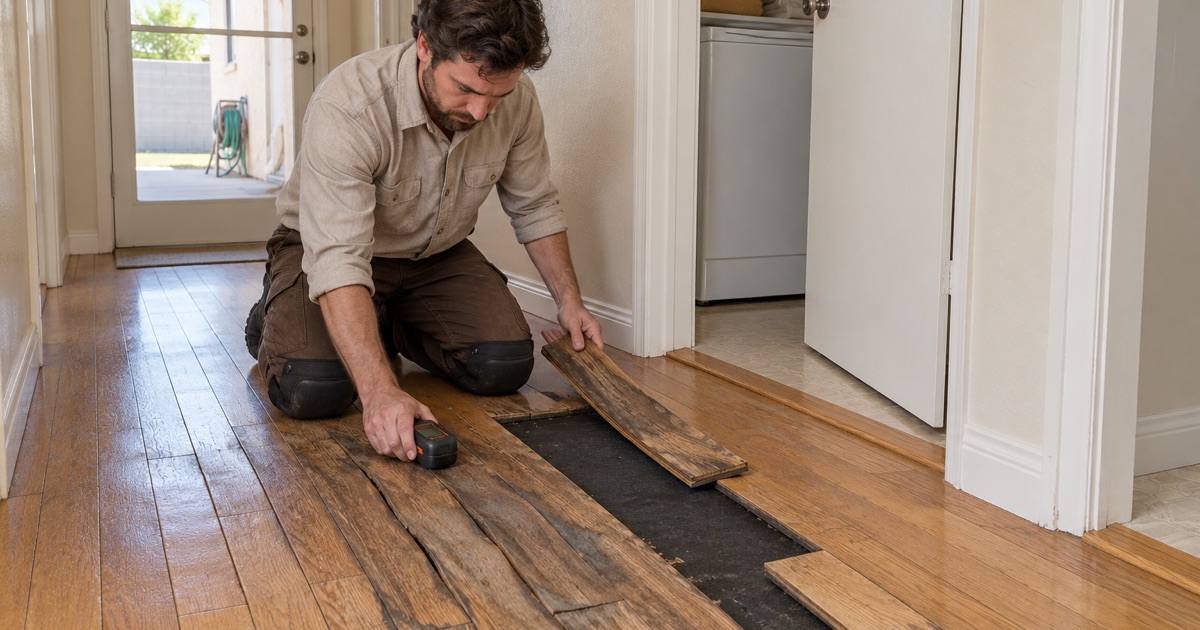
Cupping and Crowning
Cupping happens when the bottom of a board takes on more moisture than the top, so the edges rise above the center. It is the most common sign of water under a floor. Crowning is the reverse, with the center higher than the edges, and it often appears when a cupped floor was sanded before it dried.
Mild cupping can relax as the wood dries. That is why patience at the start saves boards later.
Buckling and Lifting
Buckling is the extreme case: boards swell so much they push against each other and lift off the subfloor. A buckled section usually has to be removed, but the boards around it may still be saved once the area dries.
Stains, Black Marks and Finish Damage
Water that sits on or under a floor can leave dark stains where it reacts with the tannins in oak, and gray or black marks that sanding will not remove. Finish damage such as a milky finish or white water rings is different; it sits in the coating and is often fixable with a recoat.
Assessing and Drying the Floor
Tracing the Water to Its Source
We start by finding where the water came from and confirming it has stopped. A floor cannot be repaired while a leak is still feeding it, and some sources are hidden, such as a slab leak in a hot water line or a slow drip inside a wall.
Mapping Moisture With a Meter
With a wood moisture meter, we take readings across the damaged area and into the dry parts of the floor to see how far the water traveled. On concrete, the slab gets its own test. The readings are written down and photographed with the date, which gives an adjuster a clear picture of the damage.
Drying Before Any Repair
Drying can involve removing baseboards, opening a few boards to let air under the floor and running drying equipment. We keep taking readings until the wood and subfloor return to normal moisture content, and only then decide what to sand and what to replace.
Repairing the Damage
Replacing Boards That Cannot Be Saved
Boards that have buckled, split, turned black or delaminated are cut out and replaced. We weave new boards into the surrounding floor so the repair follows the original pattern rather than showing as a square patch.
Subfloor Damage Under Wet Hardwood
When water stays under a floor for long, the plywood subfloor or board subfloor underneath can rot or delaminate. We check it whenever boards come up and replace damaged sections before the hardwood goes back down.
Sanding and Refinishing After Drying
Once the floor is dry and flat, the repaired area is sanded and refinished to match. Sometimes the best result comes from refinishing the whole room so old and new boards share one even color and finish.
Slab Leaks, Plumbing and Insurance
Working After a Slab Leak Repair
A slab leak is a plumbing repair first. The plumber may open the slab to fix the line, or reroute it overhead or through the walls with a repipe, especially when old galvanized pipe is involved. Once that work is done, we test the slab, replace the flooring that had to come up and blend it into the rest of the room.
Documentation for Your Adjuster
We give you dated moisture readings, photos of the damage and a written scope of the repair. California’s claims standards in 10 CCR 2695.9 set out how insurers handle property repair estimates, and clear documentation helps that process move. We do not negotiate your claim, but we give you what you need to support it.
Rentals and Water Damage
For landlords, we provide written estimates and invoices that show the cause, the damage and the repair. That record is useful for insurance, for tenant communication and when a property turns over.
Common Water Sources in Local Houses
Supply Lines and Appliances
Many water-damaged floors trace back to a small part: a braided supply line under a sink, a toilet fill valve, a dishwasher hose or a washing machine connection. These leaks often run slowly under the boards for weeks before the floor shows cupping or staining.
When we find one of these sources, we show you where it is so it can be replaced before the floor repair is finished.
Water Heaters
A water heater that leaks from the tank or its relief line can soak the hallway or closet floor around it. Water spreads along the subfloor and under walls, so we check readings well beyond the visible damage.
Slab Leaks and Old Pipe
Many houses from the 1950s were plumbed with galvanized pipe, and many slab-on-grade houses have water lines running under the concrete. A leak there can soak the floor from below with no sign above until the boards cup or feel warm. The plumber fixes or reroutes the line before we rebuild the floor.
Preventing the Next Problem
Checking Nearby Areas
Water that damaged one room may have spread under a wall into the next. We take readings in adjoining rooms and closets so no wet area is closed back up under new flooring.
Moisture Barriers and Trim
Where a floor meets a kitchen, bath or laundry, the right trim and a sealed edge help keep spills from reaching the boards. Over concrete, a vapor retarder under the new floor limits moisture coming up from the slab.
Habits That Protect a Wood Floor
Wipe up spills quickly, use trays under plants and pet bowls, and check hoses on dishwashers and washing machines every year. A leak caught in the first hours rarely damages more than the finish.
Our Step-by-Step Water Damaged Hardwood Floor Repair Process
Step 1: Stop the Water and Record the Damage
We confirm the source is fixed and take photos and first moisture readings before anything is moved.
Step 2: Dry the Floor
Baseboards come off, air is moved under and over the floor, and readings continue until the wood is back to normal.
Step 3: Written Scope
You receive a written scope listing boards to replace, subfloor repairs and the refinish needed.
Step 4: Repair and Refinish
Damaged boards are replaced, the area is sanded and finished, and the floor is returned to use.
- 20+ Years on Hardwood
- Written Moisture Readings
- Lead-Safe Work Practices