
Bellflower Wood Flooring handles wood floor refinishing in Bellflower, CA, serving surrounding cities including Paramount, Lakewood, Norwalk, Artesia and Downey. With more than 20 years spent sanding and finishing hardwood, we bring worn, gray, orange or scratched floors back to clean wood and a fresh finish, often on floors that owners assumed had to be torn out.
Refinishing is usually the better value when the boards themselves are sound. A floor that looks tired is often only a failing finish over good oak, and a careful sanding and new coats of finish can give it decades more life. We look at thickness, condition and past repairs before anything is quoted, so the job we propose matches the floor in front of us.
Every refinishing estimate is written and itemized, stairs included, and every finish we use meets the 275 g/L limit for wood coatings in the South Coast air basin. The sections below explain the signs a floor needs work, the difference between a full sanding and a recoat, and how we handle the older floors common across Bellflower.
Signs Your Hardwood Floor Needs Refinishing
Gray Traffic Lanes and Worn-Through Finish
When the finish wears away in hallways and in front of the kitchen sink, bare wood is exposed and starts to turn gray as it absorbs dirt and moisture. At that stage a recoat cannot bond to the wood evenly, so the floor needs sanding back to raw oak.
Catching wear before it reaches bare wood is the cheapest time to act. A floor that is only dull or lightly scratched can often be screened and recoated for a fraction of a full refinish.
Scratches, Dents and White Water Rings
Scratches that stay in the finish, and white water rings where moisture sat under a plant or a glass, can often be cleared without touching the wood. Dents and gouges that reach bare wood need sanding or, when they are deep, a board replacement before refinishing.
Peeling, Milky or Tacky Finish
Peeling polyurethane, a milky finish or a surface that stays tacky usually means a previous coat went on over wax, over contamination or with a product that never cured properly. None of these can be fixed by adding another coat on top, so we sand through the failed layer to clean wood and start over.
Full Sand and Refinish Against Screen and Recoat
What a Full Sand and Refinish Involves
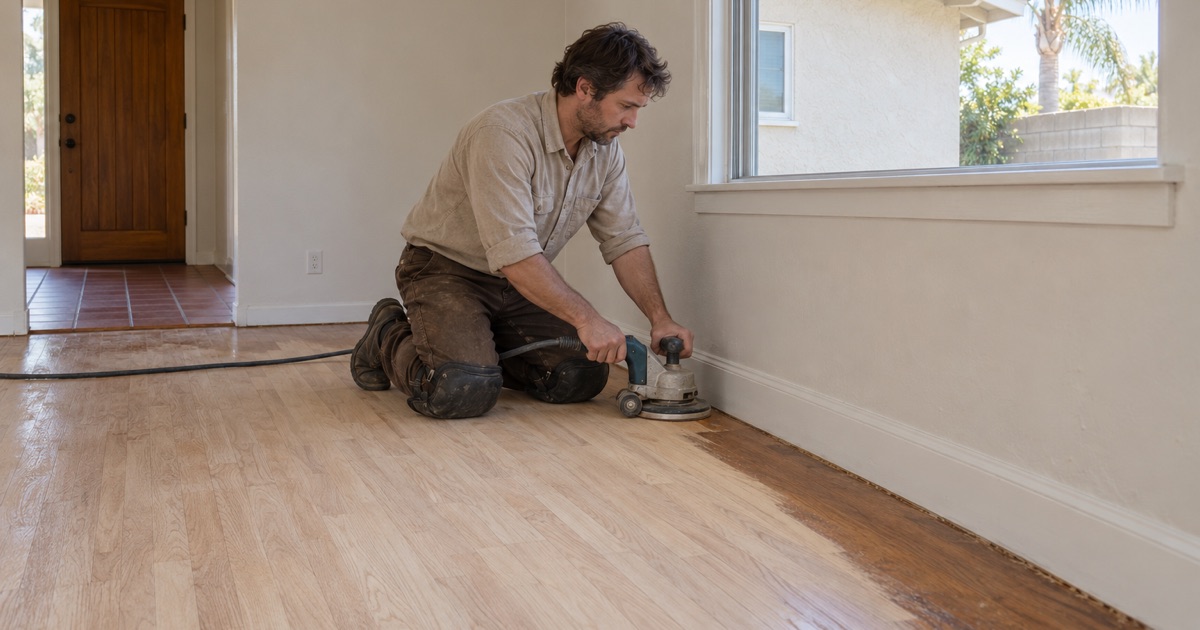
A full sand and refinish takes the floor back to bare wood with a drum sander for the field, an edger along the walls and an orbital sander to blend the two. We work through a grit sequence from coarse to fine so each pass removes the scratches left by the one before.
Once the wood is clean and flat, we apply stain if you want a color change, then build up several coats of finish. The result is a floor that looks and wears like new wood.
When a Screen and Recoat Is Enough
A screen and recoat lightly abrades the existing finish with a buffer and applies one fresh coat on top. It works well on floors where the finish is scuffed but not worn through, and it takes far less time than sanding.
It will not fix stains, gray wood, deep scratches or a color you dislike. A recoat also needs a clean surface, so floors that have been treated with wax or some polish products may not accept one.
How Much Wood a Floor Has Left
Every full sanding removes a thin layer of wood, so the number of times a floor can be sanded depends on how much sits above the tongue. We check that at a floor register or a threshold before quoting, and on engineered floors we measure the wear layer thickness to confirm it can take a sanding at all.
Stain, Color and Finish Choices
Changing Orange Oak to a Modern Color
Many older oak floors have an orange cast from oil-based finishes that ambered over the years. Sanding removes that finish, and a new stain or a clear finish resets the color. Red oak and white oak take stain differently, so we put samples down on your own boards in the room’s real light.
Avoiding Blotchy Stain
Blotchy stain happens when wood absorbs color unevenly, usually because the final sanding pass was skipped or rushed. We finish sand the whole floor evenly and test before staining the room, because a blotchy result means sanding the entire floor again.
Waterborne, Oil-Modified and Hardwax Oil Finishes
Waterborne polyurethane dries fast, stays close to the natural wood color and has little odor. Oil-modified polyurethane adds a warmer tone, and a hardwax oil finish soaks into the wood for a matte look that can be spot-repaired. We choose from products that meet SCAQMD Rule 1113 and help you pick the right sheen level for the room.
Refinishing Older Bellflower Floors
Oak Strip Uncovered From Under Carpet
Most owner-occupied houses in Bellflower were built between 1939 and 1959, and many still have original oak strip flooring under carpet or linoleum. We pull carpet tack strip and pad staples by hand, fill the nail holes and check each board before sanding, so the edges along the walls come out clean.
Patching Floor Furnace Openings Before Sanding
A house that once had a floor furnace often has a large opening in the hall that was later covered over. We frame it properly and weave matching boards into the surrounding floor before the refinish, so the patch sands flat and disappears under the same finish as the rest of the room.
Lead, Asbestos and Older Houses
In houses built before 1978, baseboards and shoe molding may carry lead paint, so we follow lead-safe practices under the EPA Renovation, Repair and Painting rule. If old 9x9 tile or black mastic turns up next to the wood, we stop and treat it as a possible asbestos question before anything is sanded.
Refinishing Rentals and Occupied Houses
Refinishing Between Tenants
A vacant rental is the easiest time to refinish, since every room is empty and the work can run straight through. We schedule around the move-out and move-in dates and hand landlords a written, itemized invoice that shows which rooms were refinished and which boards were replaced, which is useful for records and for any later deposit question.
Where the floor only has light traffic wear, a screen and recoat between tenants is often enough and costs much less than a full sanding.
Staying Home During the Work
Most refinishing jobs in lived-in houses are done in sections, so bedrooms and the kitchen can stay in use while other rooms are sanded and coated. We seal doorways, run the dustless sanding system and tell you each evening which rooms are off limits for the next day.
Pets and Fresh Finish
Fresh finish is soft for days after it is dry to the touch. Keep pets off newly coated floors for as long as the product label advises, and trim nails before they return, since claws on a curing finish leave marks that are hard to remove.
Our Step-by-Step Wood Floor Refinishing Process
Step 1: Inspection and Written Estimate
We check the floor’s thickness, moisture content, past repairs and any damaged boards, then give you a written estimate with each room, repair and stair listed separately.
Step 2: Repairs and Preparation
Damaged or stained boards are replaced with weave-in repairs, loose boards are fastened and nail pops are set. Rooms are cleared and the work area is sealed off from the rest of the house.
Step 3: Sanding
The floor is sanded with a dustless sanding system through a full grit sequence, edges and corners included, until the wood is clean, flat and even.
Step 4: Stain and Finish
If you chose a color, stain goes on after a final check of the samples. Then we apply multiple coats of finish, lightly abrading between coats for good adhesion.
Step 5: Walkthrough and Care Instructions
We walk the floor with you, point out when furniture and rugs can go back, and leave written care instructions for the finish we used.
- 20+ Years on Hardwood
- Written Moisture Readings
- Lead-Safe Work Practices